

Selenium is an open-source tool that is used for test automation. Selenium-IDE is an Firefox plug-in to develop Selenium test cases. But in this post I’m not going to talk about the Selenium-IDE. Here we are talking about a tool in Selenium, which is known as Selenium WebDriver introduced for UI Automation. From this link you can download the WebDriver, actually a set of jar files.
http://www.seleniumhq.org/download/
I’m using the WebDriver with JAVA programming language. Next we need to create a java project. I’m using the IntelijIDEA IDE for this.
- First open the IDE.

- Next go to File –> New –> Project.

- Next choose JAVA from the left column.

- Click next, On the following window, give a name for the project, a location to save the project and then click next.


- Project has been created successfully.


- Then right click on the src folder and goto add –> JAVA class.


- Then we need to add the downloaded Selenium WebDriver Libraries to our project. Go to File –> Project Structure.

- Click Libraries form the left panel. Then Click on the + sign.


- From the drop down select JAVA.

- Then we can add the relevant JAR files from the stored location. You need to add all the libraries in the lib directory, selenium-java-2.50.1.jar and selenium-java-2.50.1-srcs.jar as well.


- Libraries has been added successfully. Now we are ready to go.

- Now type the following code inside your class.
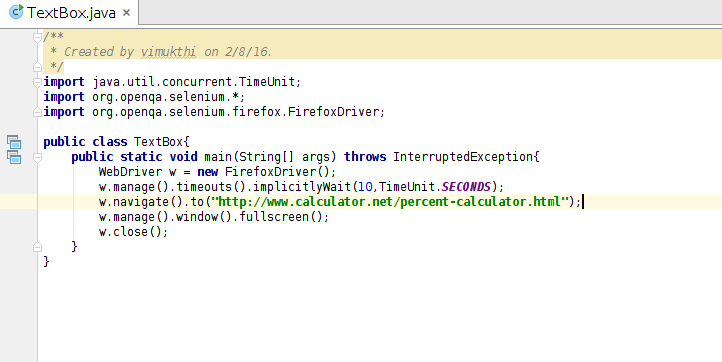
First of all we have to import java.util.concurrent.TimeUnit, org.openqa.selenium.* and org.openqa.selenium.firefox.FirefoxDriver to our project.
Then we can create a new FirefoxDriver object.
Next we have given a waiting time for the code.
Next navigating to a relevant we page.
Form the next line it will put the opened browser window to full screen.
Next we are closing the browser.
- Now you can run the project by clicking the Green Arrow icon on the right top corner.

- Then the following browser window will open and after sometime it will close automatically.

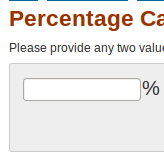
Now we have successfully completed a project and add WebDriver to it as well. But that’s not all. There are some commands which can be useful in doing UI automation. We have to deal with text boxes, check boxes, radio buttons, buttons and etc. Let’s see them with few examples.
- Now I want to find the ID‘s of few text boxes in the above page. I’m using FireBug and FirePath firefox extensions to find these.


- Now add the following code to your existing code.
findElement() is used to a find a specific element from the page.
By.id() is used to point out an element using it’s ID.
sendKeys() is used to send data to the web page.
By.xpath(), here the xpath is found using the FirePath.
click() is used to click the button on the page.
getAttribute() is used to get a attribute of the page. Here we are getting the “value” of “cpar1”. That’s what we entered.

- Now run the project and see the magic!
First it will open the browser.

Then it will enter the amount to the first text box.

Then enter the next amount to the next text box.

Next it will click the “Calculate” button t produce the output.

- After the window automatically closed down, you can see the output terminal of the IDE.

That’s how to work with Selenium WebDriver. The post has become very long. So I’ll continue the rest of the commands of WebDriver from another post. Keep in touch. Thank You!

cant we use eclips instead intellij IDEA ?
LikeLiked by 1 person
yes you can use any IDE… netbeans, eclipse, etc….
LikeLiked by 1 person
thank you for the reply.. i will try that IDE also.
LikeLiked by 1 person
(Y)
LikeLiked by 1 person
Can’t we use the terminal in linux instead of an IDE?
LikeLiked by 1 person
are you asking to execute the code?
LikeLiked by 1 person
no to write the java code…
LikeLiked by 1 person
didn’t get you??
LikeLiked by 1 person